I started making my own yogurt a few months ago after I learned that I wasn’t sensitive to A2 dairy.
After 15 years of avoiding dairy, it was really, really weird to walk out of a grocery store with milk in my hands.
But I was determined to figure out how to make one of the foods I’d missed the most: yogurt.
A2 dairy products from cows are rare in the US. Currently I can find butter and milk and that’s about it.
So as Ben Franklin once said, “necessity is the mother of invention”, and I dove into honing my homemade yogurt making skills with the help of an Instant Pot.
The Instant Pot takes the guesswork out of the process.
Most Instant Pots have a yogurt setting that is specifically meant for heating it to the right temp and holding it at the right temp during the longer culturing process.
It’s a set it and forget it kind of thing. And that’s really appealing.
If you don’t have an Instant Pot, you can make yogurt in the oven, but the instructions in this post are specifically geared toward that magically piece of kitchen gear that has a Facebook group dedicated to it.
Things I’ve learned that will help make your yogurt awesome:
#1 The quality of your milk MATTERS
I started out with a brand of milk that was ultra pasteurized.
Here’s the important part about the ultra pasteurization process: it’s not good for your milk. In taste, texture, and nutrient density.
UHT milk is pretty DEAD. The vitality has been sapped out of it.
Ultra pasteurization happens at higher heat (275+ degrees for 2 seconds) than regular pasteurization (161 degrees for 15 seconds) and is meant to prolong shelf life.
Get this: ultra pasteurized milk is meant to last 6-9 months and DOESN’T NEED TO BE REFRIGERATED, according to Wikipedia.
For comparison, regularly pasteurized milk has a shelf life of 2 weeks.
UHT (ultra pasteurized milk) was introduced to Americans in 1993 and researchers found people were uneasy about buying milk that wasn’t refrigerated.
I would be.
So milk industry folks decided to continue producing ultra-pasteurized milk but put it in the refrigerated section without advertising that it was the very product people didn’t want.
Ugh.
It’s frustrating to be a consumer in this day and age. Food isn’t just food anymore.
UHT is common in both conventional and organic milk with up to 80% of organic milk in the US treated this way.
I noticed an immediate difference in taste, texture, and easy of culturing when I switched from UHT to pasteurized.
It was dramatic.
With the high heat used in UHT, all bacteria are killed, including good ones that affect taste and help yogurt to culture.
As a result, UHT often tastes burnt to people.
Ok, so UHT milk tastes funny and doesn’t have as many nutrients, but is it harmful to our health?
“According to Lee Dexter, microbiologist and owner of White Egret Farm goat dairy in Austin, Texas, ultra-pasteurization is an extremely harmful process to inflict on the fragile components of milk. Dexter explains that milk proteins are complex, three-dimensional molecules, like tinker toys. They are broken down and digested when special enzymes fit into the parts that stick out. Rapid heat treatments like pasteurization, and especially ultra-pasteurization, actually flatten the molecules so the enzymes cannot do their work. If such proteins pass into the bloodstream (a frequent occurrence in those suffering from “leaky gut,” a condition that can be brought on by drinking processed commercial milk), the body perceives them as foreign proteins and mounts an immune response. That means a chronically overstressed immune system and much less energy available for growth and repair.” (source)
The protein structure of UHT milk is so different you can’t make cheese with it.
Just say NO to UHT milk.
After reading about UHT milk I searched for another A2 milk and was able to find one locally.
Pure Eire Dairy products can be found around the Seattle area and their herd has been genetically tested to only produce A2 casein instead of A1 casein and they raise their cows with higher than organic standards.
When I started making my yogurt with this milk it was a total gamechanger.
The yogurt was more flavorful, had a creamier, richer texture, and took much less time to culture. There was more stuff alive in it to culture!
#2 Go for full fat
I use whole milk in making my yogurt and it is soooo good! Full fat dairy from well-raised animals has all kinds of good stuff in it for you PLUS recent studies have that it can be protective against things like diabetes.
Let’s not forget that eating reduced fat products generally means a chemical sh*tstorm of salt, sugar, and weird additives.
This isn’t too much of a concern with skim and 2% milk, but it certainly is with off the shelf fat free yogurt and other reduced fat products.
Go for the whole milk. It’s great for you and way more satiating and satisfying!
#3 Starter culture
Finding a suitable starter culture is pretty straightforward for those able to digest A1 milk, or the majority of cow’s milk in the US.
Just grab your favorite organic, plain yogurt and you’re good to go!
If you’re like me and can only handle A2 milk, finding a starter is tricky as A2 yogurt isn’t readily available in the states.
So I used my favorite probiotic!
Each cap contains 20 billion probiotics, so I used 1 cap to start and it worked just fine after a few tries!
At the beginning I tried to culture my yogurt for too long and ended up damaging my starter. So the yogurt either didn’t form or it got very lumpy.
There can be more trial and error with using a probiotic starter instead of a yogurt starter, but it does work!
I would make sure that your probiotic has plenty of lactobacillus and bifido strains, as these naturally occur in yogurt and are the most common beneficial strains found in your gut.
Once you’ve made some yogurt, just use a little bit of it for the starter in your next batch!
I’ve been making yogurt continuously for a few months now and I love the idea that with each batch the probiotic content is getting stronger and stronger!
#4 Troubleshooting
This post has pretty much anything you need to know about making yogurt and correcting mistakes.
If your starter culture doesn’t take the first time, don’t worry! Mine didn’t either.
Be patient and know that your creamy dairy dreams will be fulfilled. People have been making yogurt for millenia! You’ve got this!
Ingredients:
- 1 gallon grass fed whole milk (ideally not ultra-pasteurized)
- ¼ cup starter culture from other plain yogurt or a probiotic with 10-20 billion cultures
OR
- 1/2 gallon grass fed whole milk
- 2 Tbsp starter culture from other plain yogurt or a probiotic with 10-20 billion cultures
Equipment:
- Instant Pot (I have a 6 quart)
- Food thermometer
- Fine mesh strainer
- Cheesecloth
- Large bowl
Instructions:
HEAT
Pour 1 gallon milk into Instant Pot. Close lid, setting the value to sealed. Press the Yogurt button on the keypad, then hit Adjust until you see the red readout say “boil”*.
You’re done. The Instant Pot does NOT have a “confirm” or “start” button. After you wait about 5 seconds, you’ll hear several loud beeps. This is the Instant Pot confirming your settings and starting the heating process.
It takes approximately 45min - 1 hour to heat 1 gallon of milk straight out of the cold refrigerator**. The Instant Pot will beep at you when it’s finished.
*On the yogurt setting, the milk isn’t truly boiled at 212, which is great because otherwise your milk would be burned and gross! Making yogurt requires the milk to reach 180 degrees and this is exactly what the Instant Pot is programmed to do.
**I have found that the heating and cooling times vary greatly based on whether you use UHT or pasteurized milk, so just keep an eye on it the first time around you’ll have a good time estimate for the process when you make it again in the future!
COOL
Remove the liner pot from your Instant Pot and allow to cool to between 110-115 degrees F.
I usually leave mine in the kitchen or dining room to cool as I’ve gotten used to the timing of it. If you need it to cool more rapidly, you can place it in an ice bath or outside in the fall or winter.
Just make sure to stir the milk as you take its temperature so you’re eliminating and hot or cold spots that would give you a false reading.
A skin may form over the top of the milk. You can remove this before the next step or not. I haven’t found it to make any appreciable difference in the quality or texture of my yogurt.
1 gallon of ultra-pasteurized milk takes approximately 1.5 hours to cool on the counter.
1 gallon of local grass fed milk takes approximately 3 hours to cool on the counter.
CULTURE
Once your milk has cooled remove ½ cup and place it in a bowl. Mix ¼ cup of your already made yogurt or 1 cap of your probiotic, depending on potency* into your milk and stir until dissolved.
*If your probiotic is over 20 billion/cap in concentration, I would start with half a cap. If it is under 20 billion/cap, I would do the full cap. But experiment and see what works for you!
Once your starter and milk are mixed, add it back to the milk in the Instant Pot liner and stir for 10-20 seconds to distribute it evenly.
Place liner back into Instant Pot, put the lid on, leaving the steam vent open.
Hit the Yogurt button, then Adjust. You’ll see 2 time options come up: 8 hours and 24 hours.
You can adjust the times by hitting the up and down arrows.
I needed 12 hours to culture the ultra-pasteurized milk before it got thick and mildly tangy.
The local grass fed milk only takes 8 hours to be thick and tangy. When I initially tried 12 hours it was so tangy and sour it was hard to eat!
Once you’ve selected your time, you’re done! The Instant Pot will beep a few times at you when it starts then again when it’s done in several hours.
Pro-tip: The timer on the Instant Pot counts UP, not down. So you’ll see 00:01 for 1 minute, not 07:59 if you set it for 8 hours. This was super confusing to me at first!
STRAIN
This is an optional step, but one that I love.
I grew up eating super thick yogurt so I like to recreate that as much as possible.
Line a fine mesh strainer with cheesecloth (I use a double layer) and place into a bowl large enough to hold the strainer.
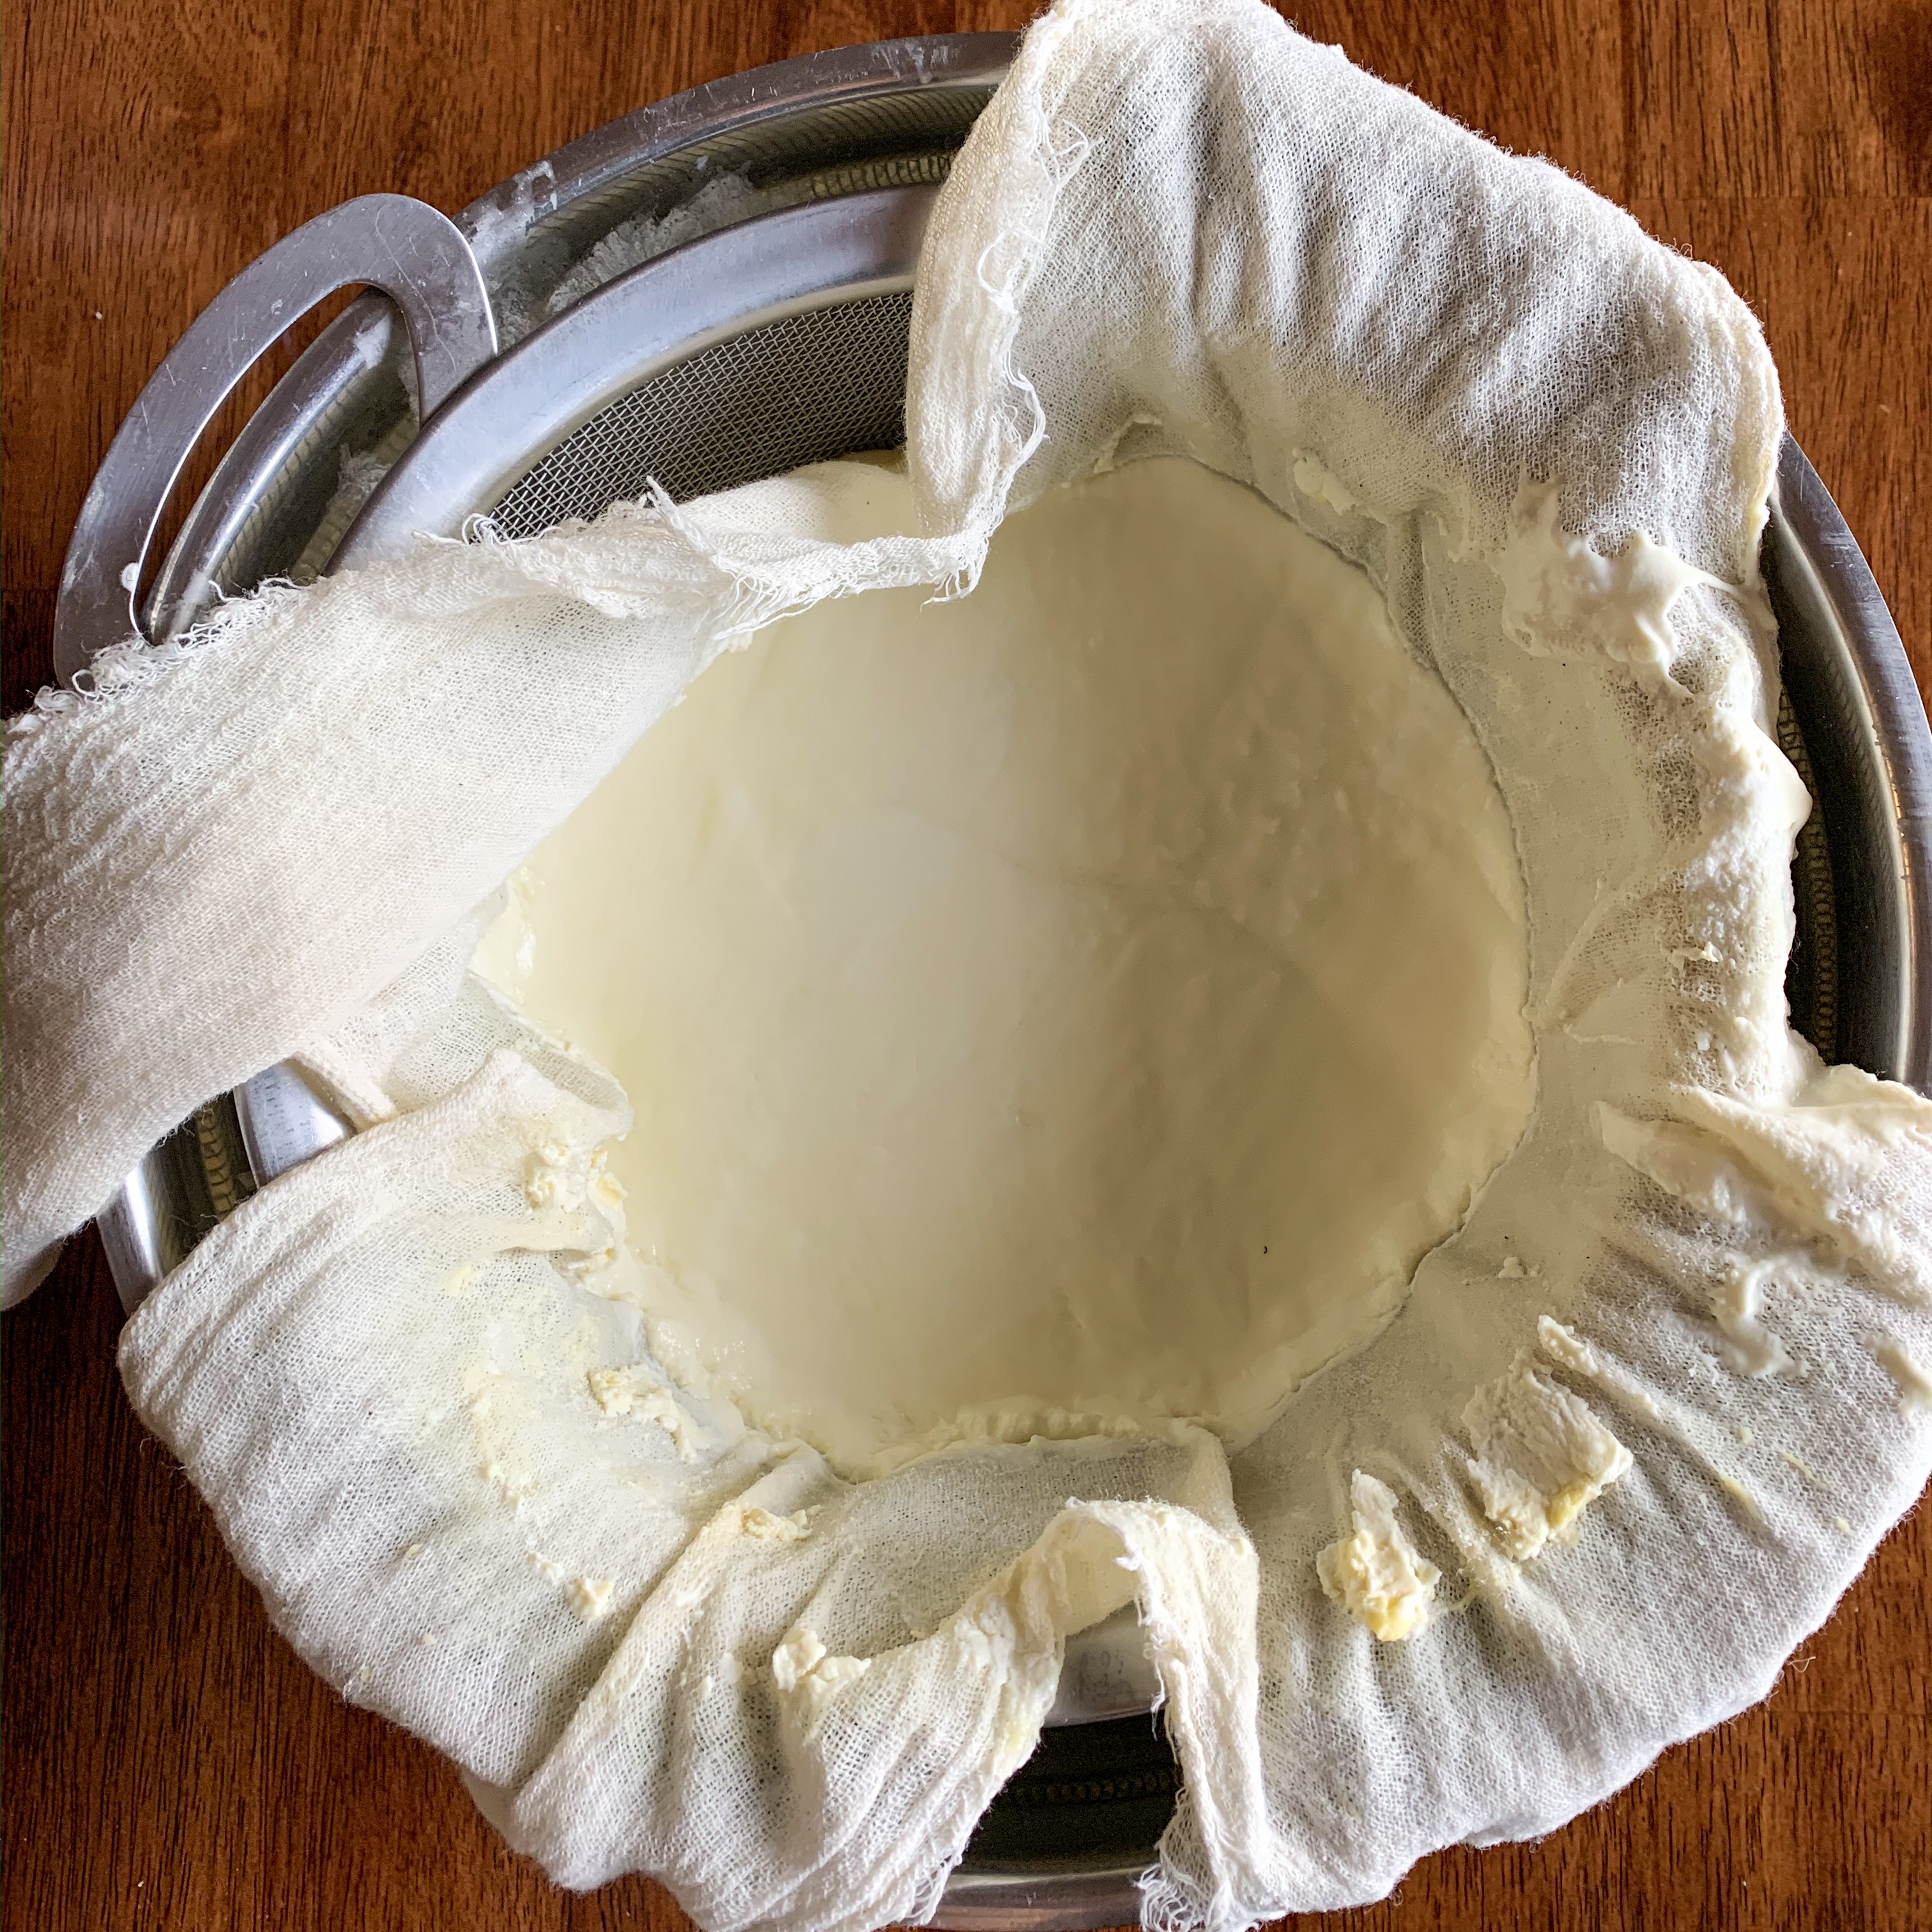
I use a 3 qt strainer and it fits about ½ of my batch of yogurt if I’ve used a gallon of milk. With just ½ gallon you should be able to strain your whole batch in one go.
Once the Instant Pot has completed its culture time, pour your fresh yogurt into the cheesecloth-lined strainer until full. Let rest in the fridge for at least 4 hours. I typically let mine strain overnight.
Once strained, turn yogurt out of the cheesecloth and into a glass storage container.
Remove whey (the liquid that’s formed in the bottom of the bowl).
Repeat this process if you have more to strain.
Pro-tip: Save that whey!! This protein-rich fluid is perfect for using instead of water in baking, adding to smoothies, and more!
ENJOY
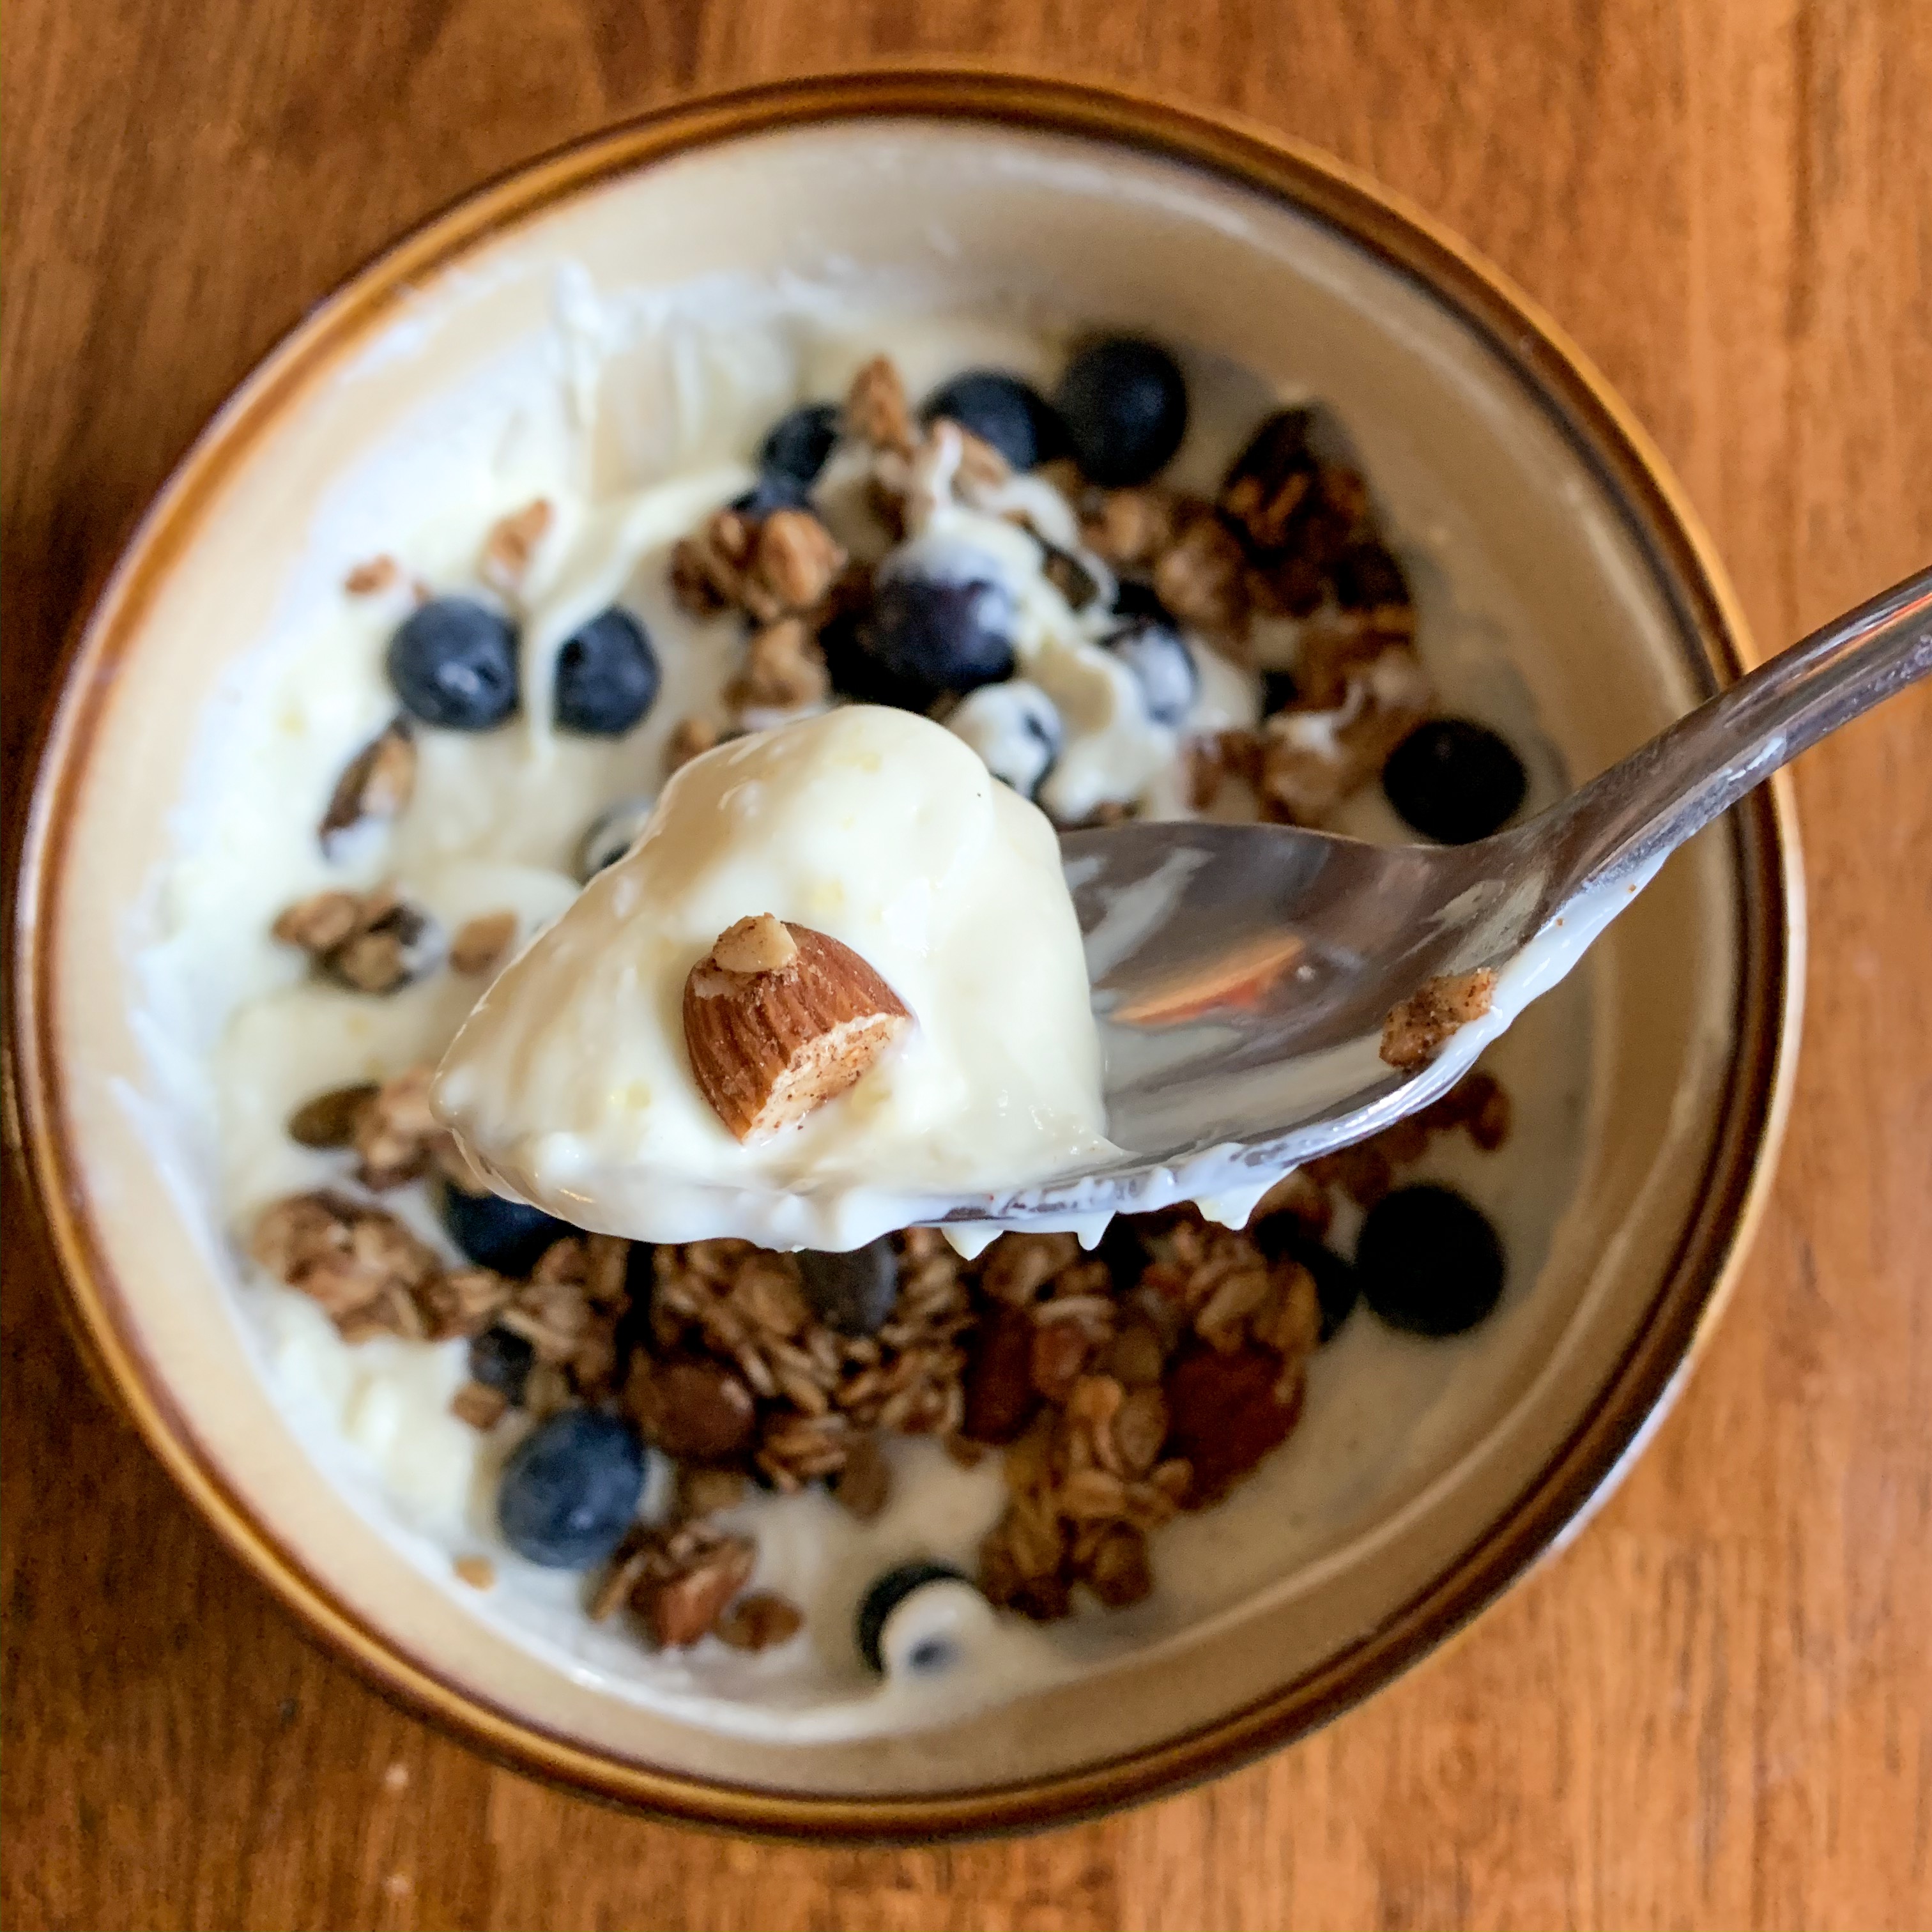
I love to mix honey into my plain yogurt to add a little sweetness to that tart tang.
I usually do that in individual portions, not the whole batch at once.
But that’s really about all I do to my yogurt!
My favorite way to eat it is with fresh berries and homemade granola.
Try adding vanilla if you’d like or other flavors!
I hope you love making your own yogurt!
It’s so gratifying to participate in a tradition that’s been happening around the world for hundreds of years.
Simple ingredients and time often make the most delicious food.