Chocolate cream pie gives me the warm fuzzies.
It was always on our Thanksgiving table right next to everyone’s perennial favorite, pumpkin pie.
When I discovered I had a dairy sensitivity at the age of 20, my creamy chocolatey forays to PieTown were abruptly cut short.
Over the years I’ve reinvented some of my classic childhood treats, and I think I’ve finally nailed it with this food-sensitivity-friendly version of a chocolate cream pie.
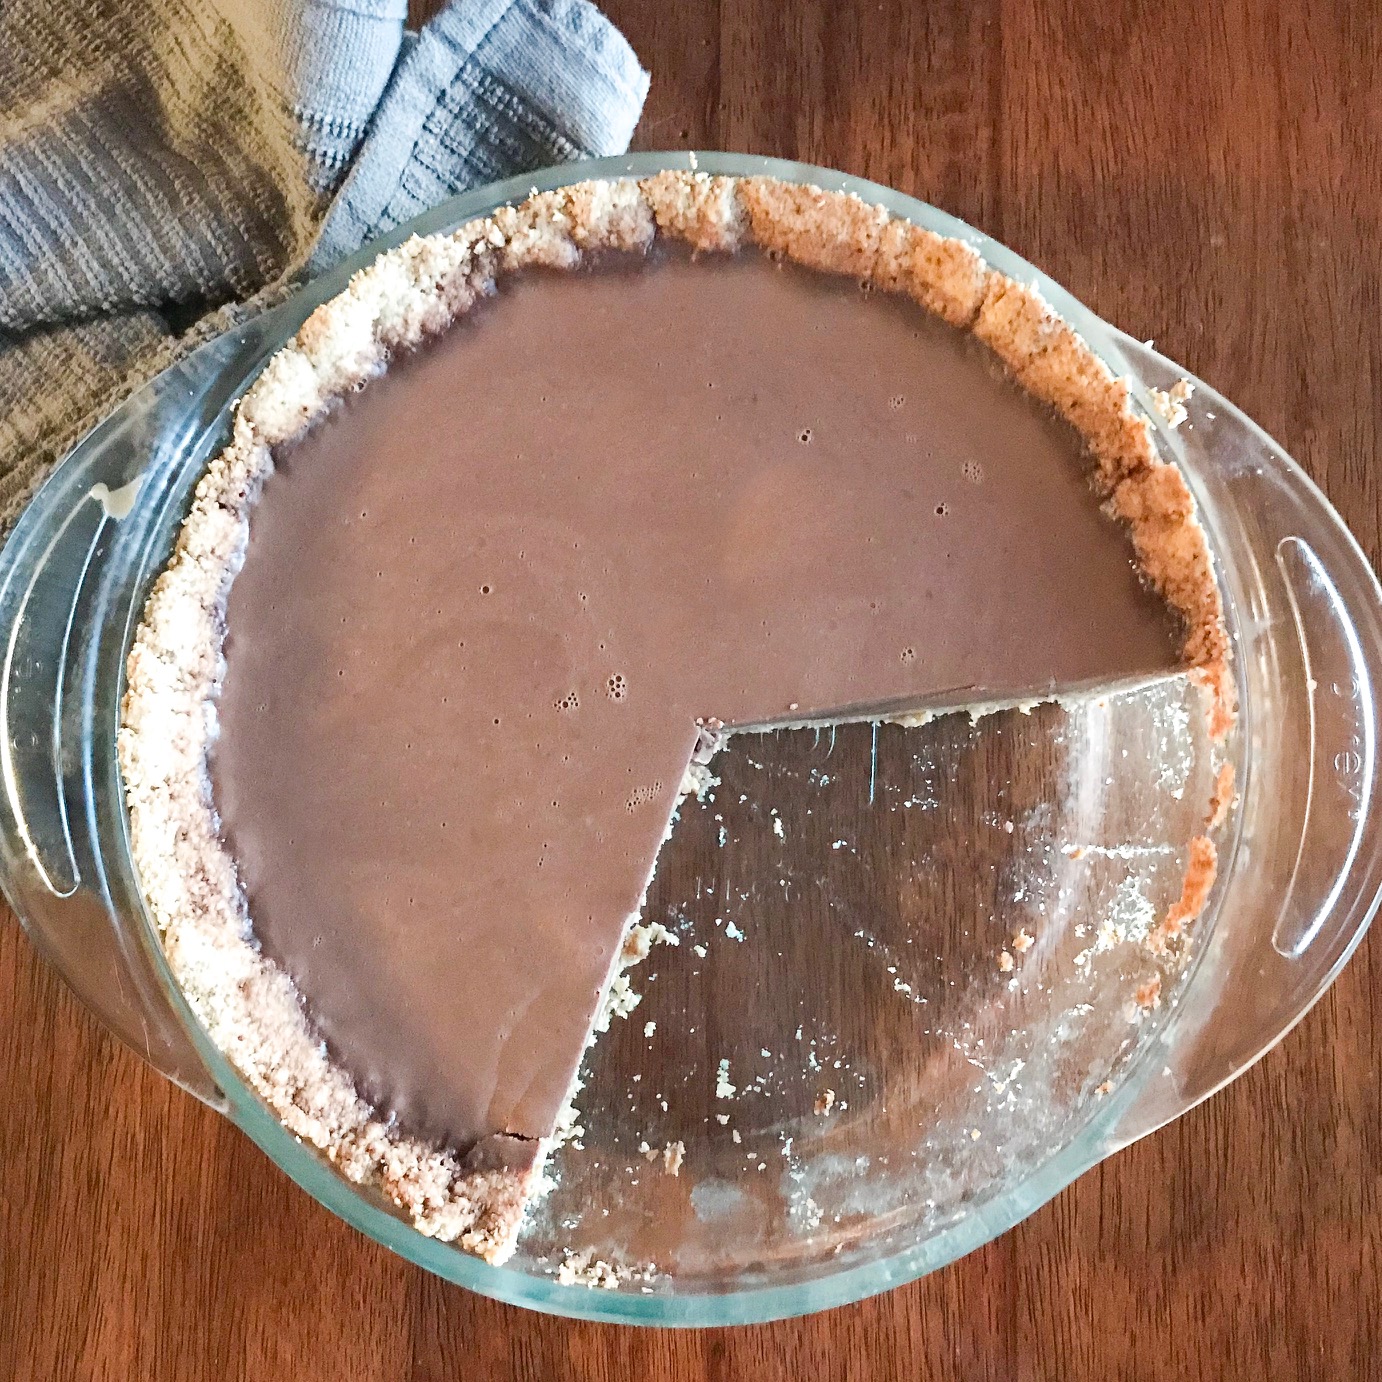
The filling is magically rich and pudding-like thanks to full fat coconut milk and gelatin.
The crust of almond and oat flours is unconventional, but delicious in its slightly crumbly texture and ability to crisp up beautifully.
It’s so good it will fill your dreams with unicorns frolicking on rainbows that end not in a pot of gold, but in GIANT CHOCOLATE CREAM PIES.
If you have food sensitivities, you know that alternative baking is no joke! It’s generally much more difficult than low-allergen cooking because nothing behaves the same way without dairy, sugar, eggs, and gluten.
And you can easily end up with a list of weirdly processed substitute foods that aren’t doing you any favors in the gut health department.
I’ve done my best to stick with unprocessed, easy to find ingredients to help make your allergen free chocolate cream pie fantasies come true!
Trust me, your dream unicorns will thank you.
Ingredients:
Crust:
- 1 cup organic rolled oats (old-fashioned or thick cut)
- 1½ cups almond flour
- ¼ -⅓ tsp high mineral salt
- 2 tbsp coconut sugar
- 1 tbsp pure maple syrup, grade A dark
- 6 tbsp virgin coconut oil, melted
Filling:
- 2 16oz cans coconut full fat milk; I prefer this one as it minimizes stabilizers and emulsifiers, which can harm your gut lining
- ½ cup raw honey
- ½ cup unsweetened cocoa powder
- 4 tsp grass fed gelatin; I prefer Vital Proteins gelatin, as they make their sourcing very clear - only organic, grass-fed cows are used.
- 4 tbsp warm water
- 1/2 tsp vanilla extract
- 2 pinches - ¼ tsp of high mineral salt
Instructions:
Preheat oven to 350.
Put oats in a food processor or blender and process until you’ve created oat flour with a fine consistency. Remove from blender and place in a medium or large sized bowl. Mix in almond flour, coconut sugar, and salt. Next add the maple syrup and coconut oil until well combined. If the mix is dry, add more coconut oil.
Press firmly and evenly into a 9in glass pie dish. Try to get a consistent thickness across the bottom and up the sides of the pie dish.
Blind bake your crust for 15 minutes then set aside to fully cool.
Note: I have found that it’s not necessary to use parchment paper and pie weights here because there is nothing that will rise/puff up in this crust recipe.
Place the gelatin in a small bowl and pour the 4 tbsp. of warm water over it. Mix thoroughly with a fork so no lumps of gelatin remain and allow to bloom. This ensures a more even distribution of gelatin when it’s added to the other ingredients. Set aside.
Shake the can of coconut milk until you can feel the cream and liquid begin to mix again. Many times the coconut cream gets separated, making it difficult to pour out. Taking a few seconds to shake the can before you open it can help you avoid a splashy mess! You might need a spatula to get all of the cream out of the can.
Pour coconut milk into saucepan and turn heat to medium high. Allow to heat through gently, then add cocoa powder and raw honey and turn to medium low.
Whisk together until incorporated, gently heating for about 1-2 minutes.
Turn off heat and add bloomed gelatin, salt, and vanilla and whisk until dissolved.
Allow filling to cool slightly (not so much that your gelatin is starting to set) then pour into crust.
If you have too much filling, have a ramekin ready to pour the excess into and follow instructions for the rest of the pie.
Gently tap pie on counter to bring air bubbles to the surface.
Allow your pie to rest for 5 minutes on the counter, then put in fridge and allow to set for at least 4 hours.
If you put the pie in the fridge before the filling has cooled enough, a “crust” forms on top of the gelatin because of the significant temperature difference. I don’t mind this crust, but it is less aesthetically pleasing.
Remove from fridge after the pie is set, serve, and enjoy your chocolatey-creamy goodness!
Store in fridge for up to 1 week.