It’s summer and that means more outdoor activities, more yard work, and generally more exercise.
It’s fabulous that we all get moving a bit more this time of year, but it also means we’re probably a little more likely to injure ourselves, or at least give ourselves some nice, achy muscles.
Or maybe we’ve just got chronic stress and tension built up in our neck and shoulders from lots of computer work.
Whatever the reason for your sore muscles, I’ve got a little something that can help get you relief now.
I'll teach you how to make a DIY magnesium balm that’s fabulous for relaxing tension and releasing tight muscles.
Magnesium is incredibly vital to our health, and yet 80% of us are deficient in it.
It’s used in over 300 enzymatic reactions in our bodies and is majorly involved in muscle and nervous system relaxation.
Using a balm gets this miracle mineral right to the tissues that need it the most, instead of having to go through digestion, where it might not get properly absorbed, or it might not even make it out to these tissues that need it.
Of course, this DIY project isn’t going to address the underlying reason for your muscle pain, but it can help to ease it quite a bit, making sleep and healing easier, and decrease the need for anti-inflammatory or pain medication.
You can even add essential oils to help improve sleep or circulation to the tissues.
So give it a shot! It’s simple to make, and eases your discomfort so you can get back to enjoying your activities more quickly!
check out my video to learn:
- Why magnesium is such a crucial mineral for proper muscle function (among other things!)
- The many extra benefits of magnesium and why you need more of it in your diet
- The surprising amount of people who aren’t even getting the RDA (recommend daily allowance) of magnesium
- Why it’s beneficial to make a balm rather than a gel or water-based preparation
- How to choose between my top 3 essential oils for muscular pain
- My special bonus ingredients that kick the this balm up a notch!
- How to make and use the DIY magnesium balm PLUS where to get all of my supplies

GET THE FULL MAGNESIUM BALM RECIPE, TIPS, AND INGREDIENT SOURCES
Create your own natural Magnesium Balm with this full recipe and guide, including where to get my recommended ingredients ...and additional tips to success.
Show Notes
- relaxes muscles and decreases spasms (1)
- calms nervous system and anxiety (2)
- promotes regularity (3) (4)
- helps you get better sleep (5)
- important component of bone health (6)
- helps decrease blood pressure (7)
Links I Mentioned in the video
Equipment:
Hamilton Beach personal blender
Ingredients:
The Magnesium
The Homeopathics
arnica montana (6C, 12C, or 30C)
rhus toxicodendron (6C, 12C, or 30C)
ruta graveolens (6C, 12C, or 30C)
bryonia alba (6C, 12C, or 30C)
Essential oils (choose 1-2)
Full Video Transcript
If you have sore or aching muscles, maybe from working out at the gym all the time, maybe you have fibromyalgia, or it's simply related to age, try out this awesome DIY magnesium balm and see what that miracle mineral, magnesium, can do for you.
Why would we want to make a magnesium balm anyway? How is it so helpful in muscle spasm, aches and pains, among other things? That's what we're going to dive into first, about why magnesium is so helpful and so great for you. The first thing you can see on the list, you can see, I have muscles, ache, and spasm. Magnesium is a really important part of helping to regulate the muscles in their contraction process. The main mineral we think of in that process is calcium usually, but magnesium and calcium have a very careful balance that needs to be established.
Often times, magnesium ends up being the most deficient one, so then calcium's out of balance, and we get this kind of weird, cramping, spasming pain. This happens acutely, like a charlie horse, or cramp in your legs or feet, twitching in your legs or feet, arms, wherever. Usually if you have that annoying little eye twitch or a twitch at the edge of you mouth, it's a magnesium deficiency. It's one that can be remedied pretty easily now that you know. Any muscle twitch, usually it's a good thing to go with magnesium, or spasm.
Magnesium also calms anxiety pretty darn effectively. It will up regulate or increase the amount of GABA in our systems. GABA, G-A-B-A, is our inhibitory or relaxing neurotransmitter. It's a neurotransmitter that tells our nervous system to calm down, to bring it down a couple notches. Magnesium activates that pretty strongly. There's also been studies on magnesium showing that a magnesium deficiency increases cortisol. That's study's been done on mice not humans yet. It is kind of interesting showing how important magnesium is in our stress hormones signaling and those pathways. With more magnesium, the cortisol will come down. I'll put some links to these studies for you guys in the show notes on the blog post.
Magnesium also improves sleep. We can kind of see that coming with maybe the muscle cramp and spasm, relaxing the nervous system. Magnesium has been proven to improve sleep and any type of sleep, so falling asleep, waking at night, and duration of sleep. Magnesium improves all of them. It's definitely my first step in sleep regulation, in terms of things people can do at home. I even have a video on this. It's called "My Number One Recommendation For Sleep." You guys kind of already know it, it's magnesium, but it's my favorite way for people to get magnesium. Feel free to hop on over and check that out. I'll also put a link to that particular video in the show notes.
Continuing on with magnesium benefits. We've got ... It improves blood pressure. We talked about the aches and spasms that it can improve. That's skeletal muscle that we're talking about. The skeletal muscle is muscle that we have control over, in general. We think about moving our arm, we move our arm or our legs, usually the ones that we exercise. Smooth muscle is also affected by magnesium. It's just that it's innervated by a different nervous system. It's our autonomic nervous system; the one that we don't have to think about.
It just kind of does stuff, like breathing, and eating, and all of that wonderful stuff. Magnesium is going to positively affect the blood pressure because it helps with muscle relaxation. It's going to relax the arteries, which is our high pressure system where most of our blood volume is. Again, this is one of my favorite recommendations for high blood pressure. Certainly not the only thing you want to use for high blood pressure, especially if it's quite high you really want to get that assessed by your physician and more intervention might be needed. If there's some mild stuff going on where you just want to start making improvements in that direction anyway, magnesium is a fabulous place to start.
It also improves regularity. Of course, again, we're still talking about that smooth muscle function. When there's enough magnesium, there is proper smooth muscle contraction. That's what happens in our GI tract. It's called peristalsis. It's actually called the peristaltic wave that we can feel kind of go across our abdomen sometimes. We've got this wave of smooth muscle contraction that actually helps the bowels to move and evacuate. Better magnesium, usually better regularity. It can also be just if you take kind of a loading dose of it, it can draw a lot of hydration into the colon, and then help move things through that way. It's got a couple functions that way for regularity.
Also, better bone health. That's one we don't really think about a ton for magnesium. We think about calcium for better bone health, right? The truth is, there's a lot of different minerals that need to be present in the body for bones to grow or form properly, even to maintain. That's our main issue as we get older is we have trouble maintaining the density of those bones. Really, one of my first things I recommend to my patients is magnesium in that regard, rather than calcium, among a few other things as well. I'll have to do a video on bone health. That will be a good one. Magnesium, again, is balancing out the calcium and it is crucial to bone health and maintenance.
All right, so pretty cool stuff. Much wider applications than just muscle spasms and aches for this balm. Pretty cool stuff. I wanted to cover a little bit about ... Magnesium's great, we've seen that. Why is it so important? Why would I need to add magnesium in? Aren't I getting enough already? What's the deal here? It's estimated that about 80 percent of adults in the U.S. are magnesium deficient. That's crazy.
As we've seen here in the reactions, magnesium is involved in over 300 enzymatic reactions in the body. It gets eaten up like crazy and it's especially involved in immune system reactions, which involve inflammation and we all tend to have a little extra inflammation floating either from diet, lifestyle choices, that type of thing. Magnesium is really depleted with that and it's also depleted quite frequently in detoxification reaction. We all tend to be a little bit more toxically burdened at this point, again, with increased stress, chemical, environmental exposure, weird stuff in food, all kinds of things.
Magnesium is a mineral that just gets eaten up like crazy and not to mention our food is typically less magnesium dense than it used to be. According to the Epsom Salt Council of America ... Wow let's see if I can talk here today ... Epsom Salt is very magnesium rich, 68 percent of adults consume less than the RDA of magnesium. RDA stands for Recommended Daily Allowance.
The thing that people mess up about RDA is that they feel like that is the maximum that they should have per day and truly, the RDA is the minimum you should have per day. 68 percent of adults are not meeting that minimum requirement for magnesium a day. It's kind of an epidemic. It's pretty widespread. Magnesium is a wonderful, easy thing to add in. I really like to encourage people to do it in these more less supplement based forms. Let's get into why we would make a balm, right?
At first, especially since we want to use it for muscle recovery, and soreness, and then some joint things possibly too, direct delivery to the tissues is super important, right? If we think about the typical way we get magnesium, which is through our diet and maybe a supplement, that has to go through the GI first and then work its way out to the muscles, connective tissue, that type of thing. Many times, we're pretty deficient so it doesn't actually make it out there. It will help over time, but that's what's really nice about the balm is that you can put it directly on these tissues that are tight, and sore, and tender, and it's going to get in there like that, which is super cool.
I also really like a balm rather than say a gel because the balm is fat soluble so we have ... I'll show you the ingredients here as well in just a little bit. With the fat soluble, our skin is also fat soluble. Our main layer of cells, all of our cells, have what's called a lipid bi-layer. That basically means that they respond to ... They're made up of fat and then they like things that are made of fat to help migrate across that medium. Having the magnesium dissolved in fat already is a great way to deliver it to these super tight muscles and connective tissue. I'm sure we all know the one right up here in the neck and shoulders, at least that's where it goes for me. You can really use it anywhere.
It's easy absorption because it goes right through the skin, the skin is actually wonderfully absorptive of what we put on it. Of course, we just talked about that fat solubility so that's a big part of it as well. Where as, if we have any digestive issues, it can really be a potential problem of getting the magnesium inside because we're not absorbing it if we've got chronic inflammation going on; food allergies, IBS, inflammatory bowel disease, Crohn's, all kinds of things, or simply low stomach acid. If we don't have enough stomach acid like from heart burn and reflux, we're certainly not digesting as well as we should be because it's a crucial part in the digestion.
Lastly, which I really like, it is not a pill, which is super cool. I really like to encourage people to use things that they would kind of in their daily life as they go about things. I think a pill is kind of this really weird, unnatural way to kind of stop and think. I don't know, I feel like it's something where it's easy to do, but it's also easy to forget. The balm, it's kind of nice, it really puts you a little bit more in touch with where are things sore, and let me just rub it right in here and see how it feels. It kind of puts you back in your body with this experience, which I really, really like. It's super pleasant stuff. It's really lovely. Arguably, magnesium delivery through the skin is just a good a way to get, as through the GI. It's pretty wonderful to do that way.
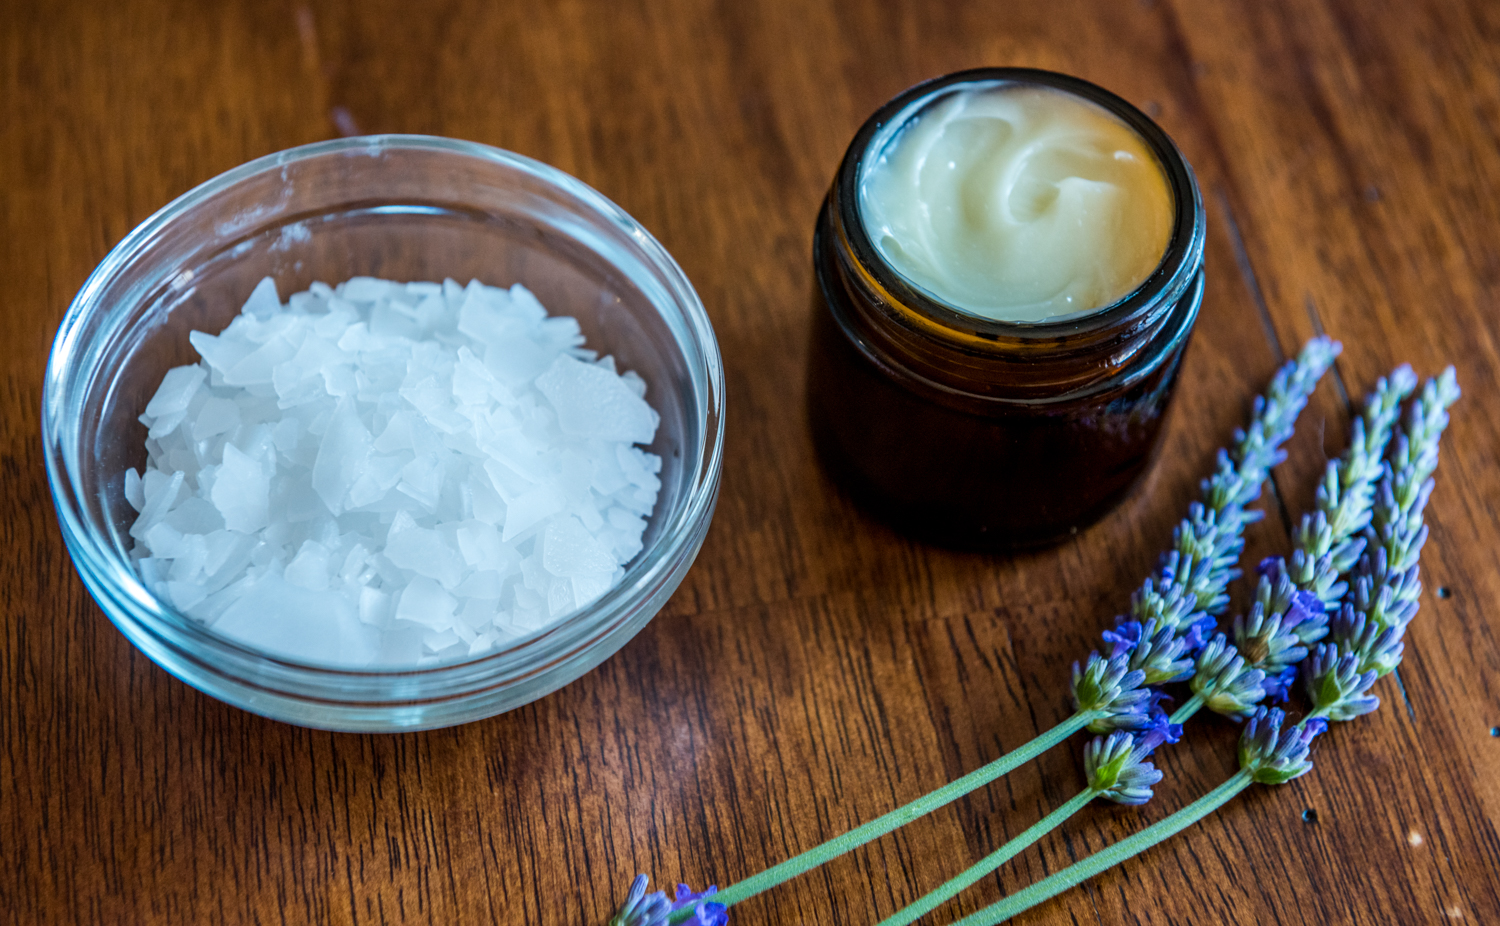
Okay, so I want to run you through some of my ingredients here. We'll start with the first and, of course, chief ingredient would be magnesium chloride flakes. I've got these lovely guys right here. I'll put links to everything that I've gotten for the products in the show notes as well so you'll be able to find it. As a bonus freebee on my website, there will be a guide explaining exactly how to make this in recipe form so you don't have to go back and forth through the video, you can just download that sup cool guide and make it quickly yourself. These are the magnesium chloride flakes. It's a highly absorbable form of magnesium. We're not going to use a ton of it for this balm, but feel free to use it in a bath if you'd like afterwards because it's great for that as well, or save it and make some more balm more Christmas presents or whatever presents.
Our next ingredient is beeswax pellets. I've just got this little baggy of them here. You can certainly get the big chunk of raw beeswax if you'd want. It's just a little bit harder. It takes longer to melt down, but quantity-wise that should be just fine as long as you have a scale to measure it out then that should be just fine. I just happened to get these along with everything else and they'll just work a little bit better for dissolving quickly.
Okay, and then our last kind of fat soluble part of this is some organic shea butter, the unrefined shea butter so it's as less processed as possible. This guy, even though it's in this container, it is kind of in like a big kind of chunk so I'll be kind of carving that off and measuring that as well. Yeah, so those are the three main ingredients. Those are the basics for the balm. Then, of course, jars. I have these cute little two ounce amber jars. I like to store all of the stuff that I make in these guys because the amber kind of keeps the light out so it keeps it fresher longer. I just got a 12 pack of these because I really like them. You can certainly get a larger quantity or a big jar. I believe this makes either four or eight ounces. Sorry, somewhere in there. I'll get that straightened out. I like the little jars because it's a little bit easier to use as well and then store. These are the jars that I decided on, but make it your own.
Now we get into the fun stuff. This is my favorite part where we're doing some extras in this balm. You could just keep it really simple and do just the magnesium, and the shea butter, and the beeswax, and call it good, but this is kind of this extra oomph that I really like to add that makes it really pleasant, gives you some more benefits as well. You could certainly add some essential oils, either one or two. These are my top three picks for the musculoskeletal conditions; lavender is my first one.
Lavender, of course, as we know is super soothing, it's really calming, so it's a lovely one to add to this magnesium balm if you're thinking of using it before bed or with sleep as well, because it is so calming. It's a little bit cooling. Some people think it's neutral in temperature so that's nice. It's also antispasmodic so it's a perfect addition to add to this magnesium increasing the antispasmodic quality of the balm. Some people really love lavender. It's a really fabulous one to add if you'd like to help augment kind of the magnesium stuff that's going on.
My second choice of essential oil is mint. It would go really, really well with lavender if you'd like to pair it with that. However, just remember mint is a little bit more stimulating so I don't really think about it so much for going to sleep time, but more kind of afternoon, morning type of time. It is cooling so it's something you want to be careful of if you are kind of already a cool person, mint might not be the best choice for you there. It is really great at improving circulation, as well as being antispasmodic too. It's a perfect addition if mint is something that you like. You can kind of go with your intuition as well as to which ones you think might be great.
My third choice, here, is lemongrass. I really enjoy lemongrass because this one is also cooling, but it's very invigorating and also has this dispersing property too so it really, really helps to break up. In Chinese Medicine, we think of it as stagnation, the stuff that's stuck in making that muscle store or that joint ache. It really helps to just kind of get in there and move all of that out of the way. It's super pleasant, super bright and uplifting scent. Probably doesn't pair quite as well with the lavender and the mint so I might do this alone.
It's another really great option and it is fabulous for muscles. In terms of essential oils, you really don't use very much of it. It's a very light amount. You also want to make sure you get oils that are as pure as possible because essential oils are the most concentrated part or extract of a plant you can possibly get. They are very, very potent stuff and that means that if they're that concentrated and they've got pesticides in it, then you've got super potent pesticides that have a very easy way to get into your skin in the body. I will put a link to my very favorite brand that is really clean for you guys in the show notes as well.
That's the essential oils and then we'll go on to my super secret ingredients here that I really love. I love to add homeopathics to this balm. I just think that they kick it up a notch, they're super wonderful, they're easy and affordable, and then they're also really nice just to have on hand. Especially, these are any muscular, skeletal, ligament, tendon kind of ache, pain thing that comes up. These are really great to have on hand. You'll see them, the most common brand is Boiron. They're in these blue tubes and pretty darn easy to use. We'll kind of go through that in the How To video. You can see I have all four of them here so I'll se these down and I'll take you through what exactly each of them do.
Arnica is probably the most common one. A lot of people have heard of Arnica. They think about it after trauma, after any type of sore muscle, bruising type of thing. That's really what Arnica is specific for. It's specific for this feeling of soreness, like you're so sore you can't get comfortable in bed and then also bruising. It's really amazing at helping clear up bruising. Rhus Tox is specifically for stiffness, in the joints especially, and then it also has this special thing where when you get out of bed in the morning you're really stiff and achy, and then once you get going you actually feel better. That's a very specific reason to use Rhus Tox itself to help you out with that. It's great for that overall achiness as well.
Then, Ruta is also very similar. It has a similar profile to Rhus Tox, but it doesn't tend to be helped by that first movement. It's mostly just fatigue overall so this kind of achy joint, stiffness, pain that's happening. That's also why I said this balm might be good for joints too. I haven't used it extensively that way, but I don't see why not because of these extra homeopathics that we've added, these three are really fabulous for joints. Of course, Arnica is going to help anywhere that's sore or bruised. The addition of these can really be great. Give it a shot.
Put it over your shoulders or your knees and see how it goes, as well as the muscles which would be its primary use. Bryonia is a really nice one for ... Specifically, for swelling in the joints. It really works on the membrane that's on the inside of the joints. It's called a serous membrane and that's where a lot of swelling and irritation can accumulate. The joints are very limited in terms of circulation so it can take a long time for swelling to get out of there if it gets in there, if something gets inflamed. Bryonia is a fantastic thing to help with and it will help with swelling elsewhere as well, but over the joints especially it's lovely. Those are all of my ingredients and we'll move on to actually how to make it.
Okay guys, here we are in my kitchen with all of my ingredients and tools. I am going to run you through those one more time really quickly so you can kind of see them in real life. I've got all of my fats line up here and they are actually corresponding with how I've aligned them against the wall. I've got my quarter cup of shea butter, my quarter cup of coconut oil, and my eight a cup of beeswax pellets. Then, right over here I've got my half a cup of the magnesium flakes.
I've got my trusty little, personal sized blender which I love because it's smaller so it's perfect for these smaller kind of project sizes. I've got the essential oil I'm going to use today. I am going to go with lemongrass because I've made this with lavender a couple times so I wanted to switch it up. I've got my two tablespoons of water that I'm going to dissolve my magnesium flakes in. Of course, I've got my chopstick, and my spatula, and these are my little amber glass containers that are two ounces, a little tablespoon measuring, and then my homeopathics. I've got all four of those lined up here. As you can see I've already put three of the four remedies in this glass already and then I've got my one tablespoon of hot water to add to that as well.
I am going to give you a little demo of how to put this fourth remedy in there because sometimes the tubes are a little tricky if you've never done that yourself. That's everything you need for ... To make this balm. Before we get to the homeopathics, I just wanted to hop over to my stove here to show you my makeshift double boilers. I do this all the time. I've never actually owned a true double boiler. I just take ... We'll look at this guy, for example, my little pot. I've got a little mixing bowl you can see that it seals pretty well here. The problem or the issue sometimes people have with making their own double boilers is that the bowl isn't big enough so if this gets really, really boiling, the steam kind of comes up the side and that water can mess up whatever you've got going on in here. I usually do a very gentle boil in this pot so I never have that problem. I'm going to lift this up and you can see that there is water in here.
The other thing I'm going to make sure is that that water level is not high enough to be on the bottom of this bowl. You can see there is a little bit of water so I need to dump a little bit of that out. I also think some of that is condensation because I had some warmer water in there. It's the same with this guy here. We're doing the same thing. You can see this guy's pretty clear with that water line there. As long as the water is boiling under here or kind of simmering and not actually touching the bottom of this, we don't want it to get so hot that it will burn, those are your makeshift double boilers. That's that. Let's get in to how to actually make this now that we're all set.
Okay, so for the homeopathics demonstration, how to open and use these tubes. I just wanted to give you guys a little preview. Boiron is typically the brand that you'll see. It's these little, blue tubes with these white pellets in it. They're about eight bucks a tube so really affordable and they last forever, which is lovely. To open the tube, you've got this little strip along here that I've kind of loosened right here. This is what you want to do, you want to pull this fully off. I'll just put that over there.
To get the pellets out, all you do is turn it upside down and you twist the cap. That's all there is. You can see there was a little one that fell in there. Twist it again, you've got another. Twist it again, you've got three or so. There you go. That's perfect. Then, you just open it up, you see the pellets in the cap, and then you put them right in the glass. It's all there is to it. You don't want to touch the pellets because the remedy's actually stuck to the outside. You don't want to rub that off there. That's all there is to it. Homeopathics really do best interacting with glass and wood. They don't really do well with metal. That's why we have this special glass separate from the metal mixing bowl. That's kind of the only trick in this whole recipe.
I've got my hottest possible water, right here one tablespoon of it. I'm going to pour it right on in here. These homeopathics do take a while to dissolve. Then, I've got my wooden chopstick here that I am just going to stir it with kind of off and on. This is enough water for them to dissolve. Again, if they don't dissolve fully, that's okay because you're going to be adding in hot oil which is going to further dissolve them. Again, it's not a big deal to me if I have like a little bump of one of these guys in the balm. Even if they're partially dissolved, we know that some of that remedy is in the water, which is the most important part. That's really all there is to it. I'm going to just kind of babysit this and stiff it on and off in the process, but let's get some of those fats and the magnesium starting to dissolve.
I'm going to get my burner turned on here kind of to a nice medium heat. You can see my double boiler I've got set up. I'm going to start by adding the shea butter in. I've kind of tilted the bowl here so you guys can see. I'm going to add my coconut oil, my quarter cup there. Okay, there we go. Then, I'll add my eighth of a cup of beeswax pellets. That is all there is to it. That's it for the fat. We're going to kind of let this settle for a little bit. We're going to let it melt. We're going to make sure that we're watching it so it doesn't get overly hot or that the double boiler gets overly hot, but that's about it. It should take probably five minutes for it to melt down. I'll certainly show you that and then you want to stir it along the way.
Okay, I've got the heat started up on my second double boiler, which is going to have the magnesium flakes in it. We're going to go ahead and put those in. There we go, and my two tablespoons of water. Perfect. I'm going to grab my wooden chopstick. You can use whatever you want with this too, but you can see that the water is already kind of making a slush out of the magnesium flakes which is exactly what we want. We just kind of want to stir it. Over time, they get slushier and slushier, and then they fully dissolve. Again, you do want to stir this a bit so you're kind of going between this double boiler and the other. Just gently stir it to make sure everything dissolves.
Now you can see all of my oil is melted, which is perfect. It's been about five minutes. I'm going to grab my little hot pad here because it is pretty toasty and move it right on over here to the cutting board to rest. I'm also going to do the same thing with my magnesium flakes. They're all melted down here. Great. That's that step. You can also see that my homeopathics are totally dissolved. I've just been kind of swirling the glass around while I've been waiting for these guys to fully dissolve.
Now what we want to do that these are cooled just a touch ... I can actually pick this up, it's not quite so hot. I'm going to pour these magnesium flakes in with the homeopathics. We've got all that in one spot. The trick with the oil, you can see I've removed the spatula, is that we're going to wait until it's cooled just enough, about five minutes, for kind of a little right of wax that is cooling just along the outside of this oil puddle. That means that it's cool enough. It's cooled enough that we can go ahead and put it in the blender at that point. I set a little timer for five minutes or so. I'm going to keep checking back in on this and then we'll get started once that ring is formed.
As you can see, we've got this nice, somewhat solidified ring formed around the bowl with the oil. I'm going to set this down here. It's ready for you guys so we're going to pour the oil right on in here. Great, okay. Then, of course, we want to get the extra out of there. You can see that. See how it's kind of thickened a little bit, but definitely not solidified is really the goal there. Sorry, probably not a great angle for you to see, but you get the idea. You can see we've got all of our oil in and then I've added the top to the blender. This is the hardest part of the entire balm making experience. We're going to turn the blender on and start getting this whirring around a little bit.
Once we get that all done, we'll take the top off here, and then we're going to slowly, slowly drizzle our warm magnesium water in here. This is the hardest part of the entire thing because we want to make sure we don't get too much water in at once, otherwise, the bottle will not hold together, it will break, and you won't get this nice kind of fluffy, buttercreamy-like texture essentially. I apologize ahead of time for the camera angle of this one, you guys. I'm just one person so it's a little bit tough to orchestrate getting a great camera angle all the time.
Here we go. I'm going to start with the blender. Great, okay. I'm going to make sure this just gets nice and scraped down here. Okay, and now we're going to start by slowly drizzling in our water while the blender's going. Okay, so you can see there that I also used my chopstick a little bit when things got really thick along the side. We've got this nice kind of creamy texture here. I'm going to add in my essential oils really quick and then I will show you the full texture.
We're going to do the same thing again, we're going to turn the blender on and then just drop in as many oils as you want. I'm probably going to do about 30 to 40 drops or so for a lightly scented balm. Okay, and there we have it, you guys. I'll bring it up so you can see what the texture of this looks like. You can see how it's very smooth and creamy. That's exactly what you're looking for. We know that the water got incorporated into the balm really nicely.
Now, I'm going to set this down and we're going to get the balm into the jars. I'm going to start the difficult task of actually putting the balm in the jars. I have to laugh to myself because this is a really messy process and often times it does not look very pretty going in. I might just not have a good system for it, you know, but just don't expect it to look amazing like the creams that you get in the store immediately. You can kind of smooth it out afterwards, which is what I did for taking photos of it.
As you can see, it is pretty unglamorous. I do have three of these jars prepped here because it does make usually about five to six ounces of balm, which makes sense with a quarter cup is about two ounces usually. We have two quarter cups and an eight of a cup. You can see it's kind of a mess. I overfilled that one. I have just a touch left here and I might actually fit everything into two jars this time.
The real thing that you want to do here as well is really make sure that you clean up afterwards, but all of this that's left in here, you really want to make sure, a) you get a lot of into your third jar if you want or b) that you run a lot of hot water and a lot of soap because it is fat, it is thick, and emulsified. It can clog up your pipes, essentially, if you're not running a lot of hot water and dissolving it and using a lot of soap. That's that.
I just wanted to show you what it actually could look like when you make it look pretty. I did this. I just kind of swirled it with my finger and it turned out pretty well. I didn't have anything in particular that made it into that shape. This requires a little bit of clean up because we do have these jars. The jars that I got, I really like the lids because they have this little ... I'll dump it out for you, this little plastic guy in there as well that kind of fits right over the top and keeps it really, really nice and clean off of the lid for you there. I really like these little amber jars. I'll put a link to them for you in the show notes.
You can see this is a little bit darker I color. It lightens up a little bit when it dries. It does get thick. It's definitely thicker than a lotion, but not quite as thick as a salve itself. It's kind of a nice middle ground. You can put it on anywhere that's sore; joints, muscles, achy tissue. I find that it works the best on chronic tension and pain. That is your magnesium balm. It should be cool within an hour or so and it will store and keep for quite a while. You can also label it. I would also ... I would highly recommend labeling it with the date on there so you can kind of keep track of when it might not be so great after a few months. Usually with these oils, they're very shelf stable and they should hold up for quite a while.
That's it for today. Thanks so much for stopping by to learn how to make your own DIY magnesium balm. It's certainly more affordable to make your own than it is to buy it in the store. Also it's fully customizable if you make it yourself, right? Use whatever essential oil you want, use the homeopathics you want, or if you want to leave those out that's totally fine too. It's a great place to start if you're really into making your own products. Okay, thanks so much for watching. Take care.
Ooh, don't run into the counter. You guys, I am amazed that I got miracle mineral magnesium out on the first try and that I came up with that on the fly. I hope it didn't sound too cheesy.